Pot roast gets a bad rap in some circles. “Diner Food”, “Boring”, “Old Fashioned”, “Gramma’s Dinner Choice”, and other, equally vile epithets. I’m here to tell you that properly done, a good pot roast is a sublime thing of joy. The aroma alone makes the house sing “Dinner is cooking and you’re gonna Love It!” and the simplicity and accessibility of the dish means most eaters will dive right in with no qualms.
I’ve made pot roast perhaps two dozen times in the past decade – about twice a year is my average. Last night my audience of critical eaters was kind enough to let me know that this pot roast was the best to date. Doncha love that “to date” thing – you could probably do better, improvement is always possible, but so far, this is the one!” But I digress. . .point being, they really really liked it.
And I know why.
I’ve tried searing the meat, not searing the meat, cutting the roast into pieces, leaving it whole, using flour to dredge the meat, leaving the meat undredged, using no seasoning other than salt and pepper, using a variety of different seasonings, using boiling water, using boiling beef broth, adding tomato, not adding tomato, cooking in the oven, cooking on the stovetop, cooking with X-ray lasers. OK, I’m lying about the X-ray lasers, but wouldn’t it be cool??
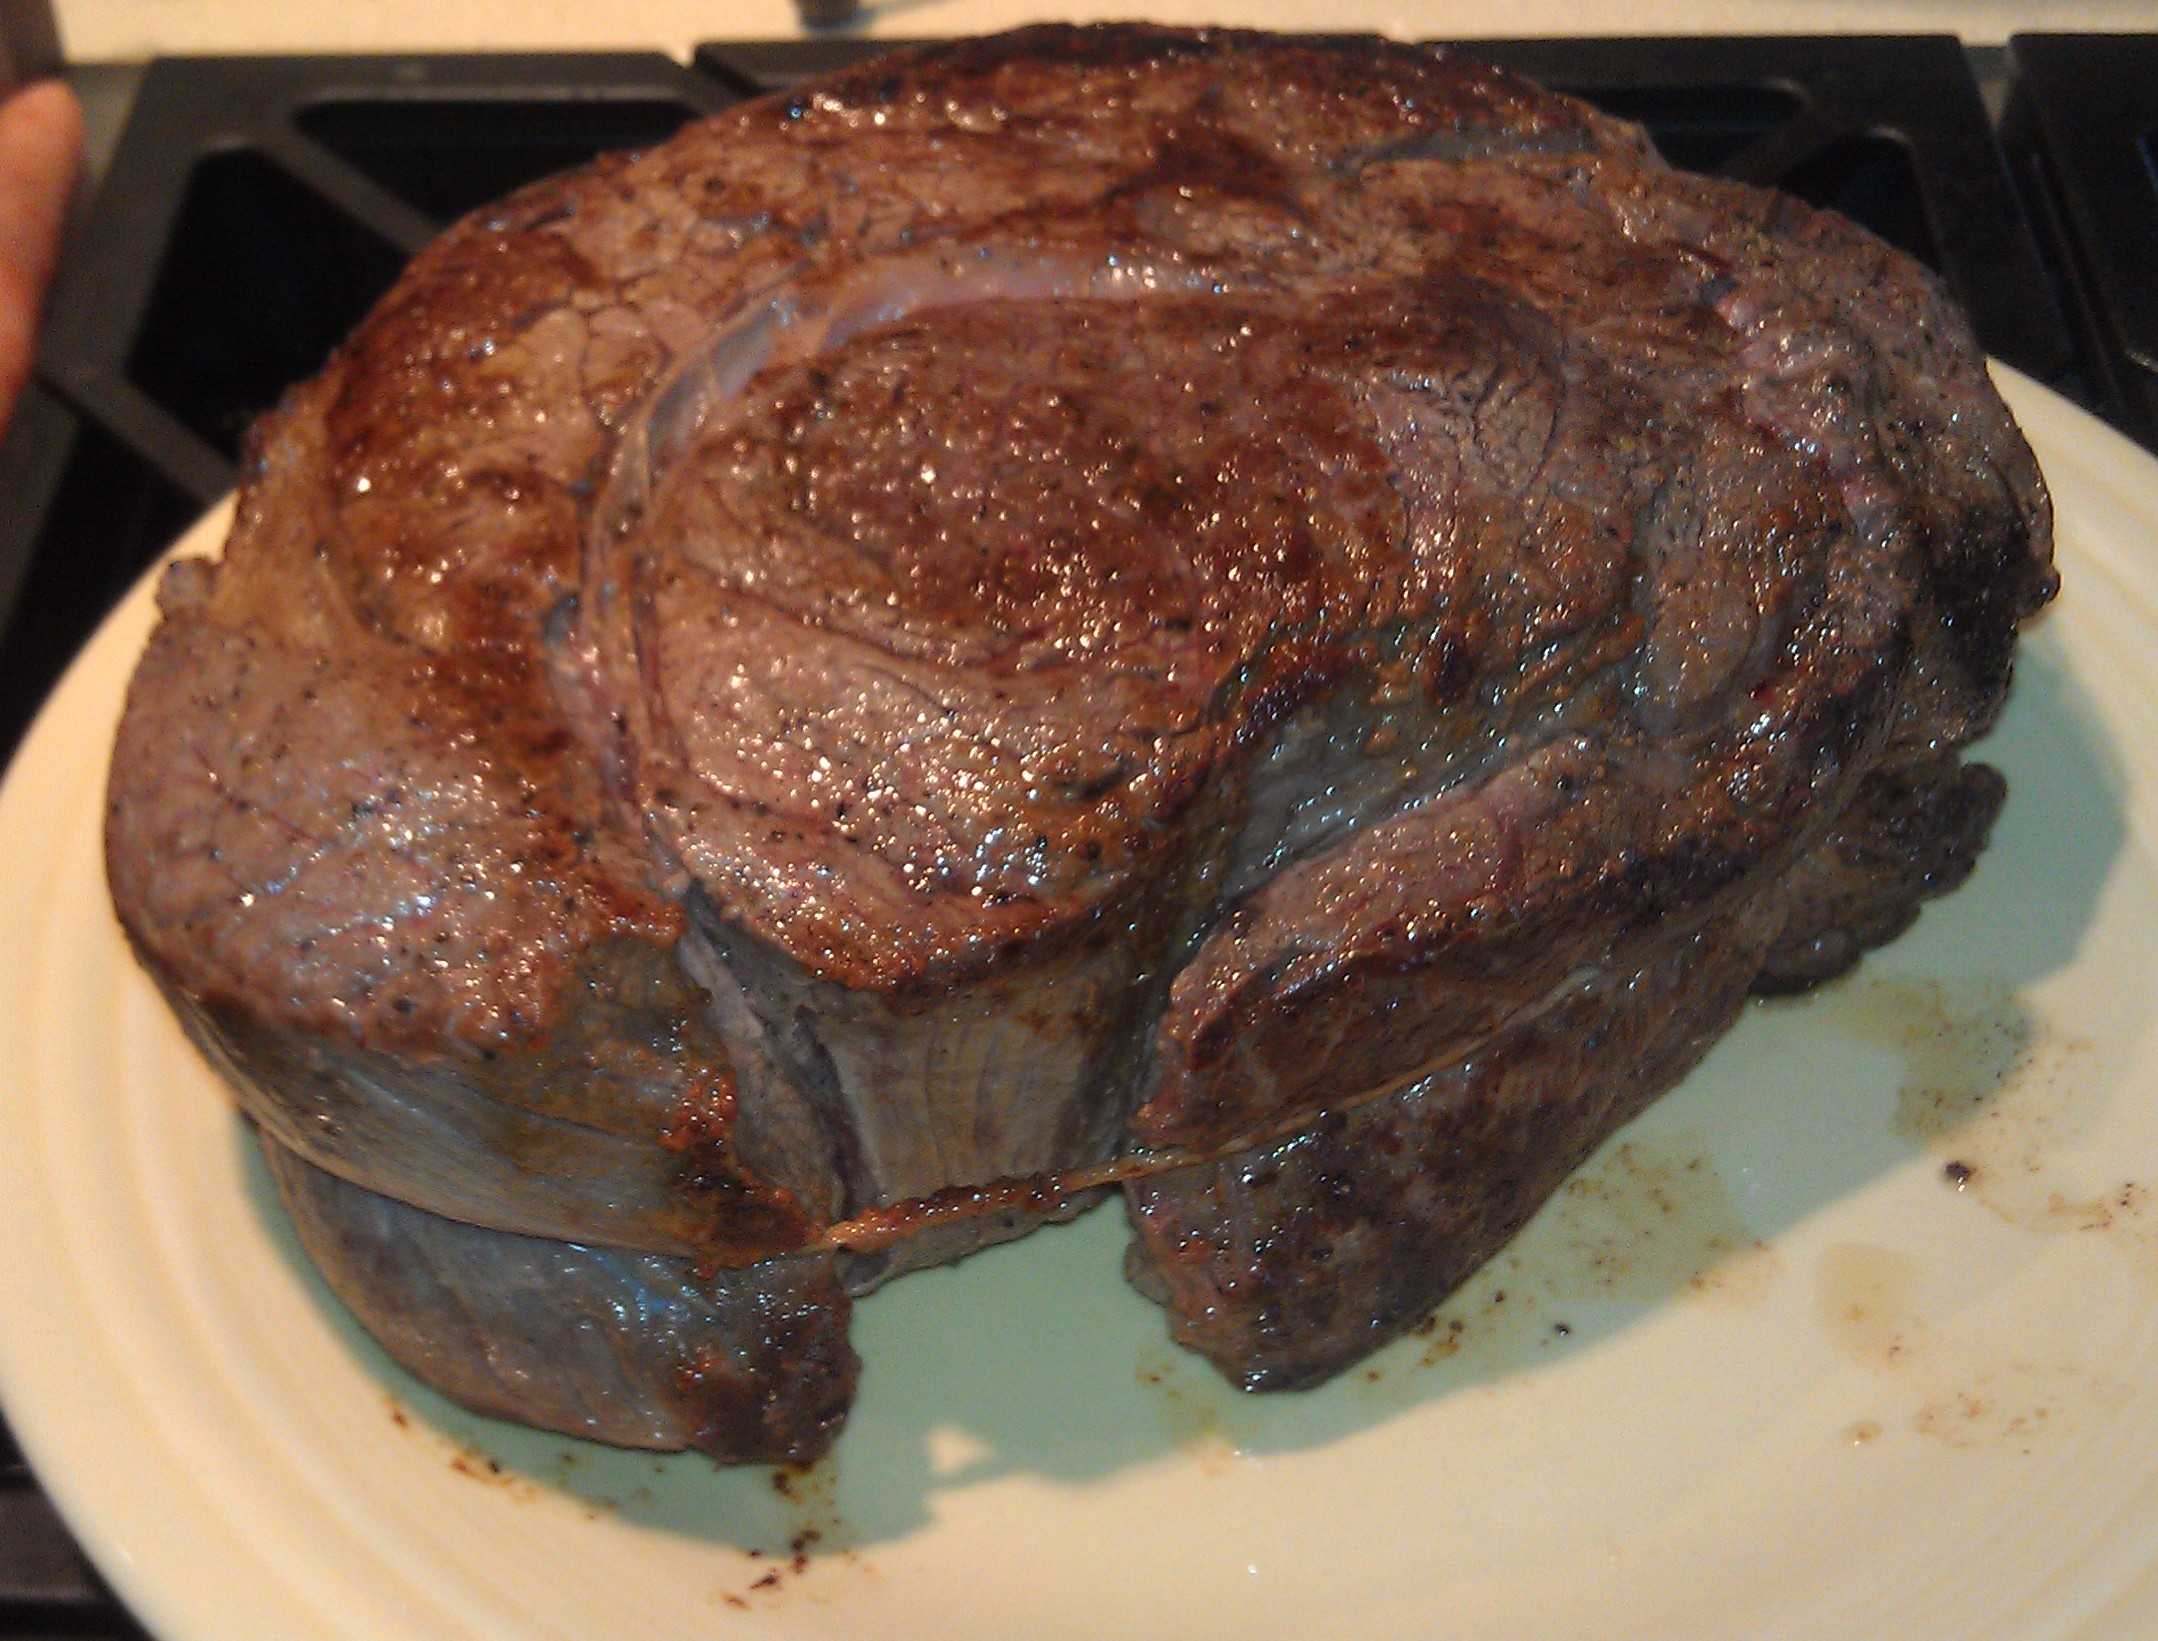
First, you brown the roast on all sides
While your choice of seasonings may vary according to your mood and the season – and really, salt and pepper plain makes a beautiful feast! – there are a few simple tricks you can use to ensure you get a beautiful, meltingly good, moist pot roast every time. I’ll share those with you in the recipe below. While I’m a big fan of improvisation and creativity, if you haven’t made much pot roast, I suggest you try it out pretty closely the first time. After you’ve got the process dialed in, you can let your freak flag fly!
Factory Pot Roast with Bonus Roasted Root Vegetables
Ingredients for 6 solid servings
- One 3-1/2 lb. chuck roast. Have your butcher or the butcher at the supermarket cut one and tie it for you. Chuck. It’s the one you want.
Handy Tip: When you make the pot roast, take the chuck out of the refrigerator a few hours before you start cooking and let it come up to room temperature. It will take less time to cook and be juicier. - 2 cups rich beef broth, and do not fear, you can make pretty decent rich beef broth with Better than Bouillon. And it is. Better. Not better than your own beef stock, but entirely better than bouillon cubes or beef bouillon in a can.
- 2 C. boiling water – you may or may not need all of this, depending on how juicy your roast is – see Method for more info.
- 2 large white onions, thickly sliced
- 8 cloves garlic, minced
- 1 T. or more of coarse salt – Kosher salt is great, coarse sea salt is also good – this is for coating the meat before searing
- About 1 tsp. freshly ground black pepper. Also for coating the meat. Do yourself a favor and grind the stuff – it’s much better in this dish.
- 1/2 tsp. chipotle powder
- 1 tsp. smoked paprika
- 1/2 tsp. ground cinnamon
- 1 T. red wine vinegar
- 1-1/2 tsp. dried thyme leaves
- 3 large bay leaves
- 3 large carrots, peeled (or not if you have strong feelings about carrot peel) and cut into approx. 1″ chunks on the bias.
- peanut oil for searing
- Cook in: 4 l. or 4-5 qt. Dutch oven. Try to avoid using a larger pot, if possible. You really just want one that the meat, a bit of liquid and the onions will fit into comfortably.
Important – Your pot should ideally have a very tight fitting lid – it’s a key part of the stewing. If the lid isn’t tight, put a sheet of tinfoil over the top of the pot and mash the lid down on that to create a seal.
For the roasted root veggies
- 6 medium potatoes, peeled and cut into 3/4″ chunks
- 2 parsnips, peeled and cut into 1″ chunks
- 1 large turnip, peeled and cut into 1″ chunks
- 1 sweet potato, peeled, cut into 1″ chunks
- One shallot, halved lengthwise and cut into thick slices
- 1-1/2 tsp. coarse salt
- olive oil
Method – for the Roast
Prep the meat: Sprinkle all sides of the meat with coarse salt and freshly ground pepper. You may use a fair amount of both. Let it rest for a few minutes, then. . .
Sear the meat: Put the Dutch oven on the range on High and heat it until it’s hot. Add 2-3 T. peanut oil and swirl, until the oil coats the entire bottom of the pot. Wait until the oil is shimmering, but not quite smoking. If it’s just starting to smoke a little, that’s absolutely fine, when you put the meat in, the temperature will drop precipitously.
Important: Do not move the meat while it’s searing, other than to turn it when each side is seared – that way you build up the best caramelization / browning. Adjust the temperature up or down if necessary to keep the roast frying vigorously, but not smoking impossibly. After 5-6 minutes, use tongs or a large heavy spoon and a meat fork to turn the roast onto its other side. Then sear the smaller sides – they won’t take as long.
Remove the seared meat to a warm plate and keep it nearby
Fry the onions and garlic: When you remove the roast, the pot will have some peanut oil, a fair amount of liquid from the beef, and a little bit of rendered fat. Generally, this is all good, I recommend using it. Add the onions to this – you shouldn’t need much additional oil, if any. Stir the onions on medium high until they are translucent and just beginning to turn brown. Just. Then add the garlic and stir for another minute or two.
Add half the boiling water (or very hot tap water) and scrape up the precious bits from the bottom of the pot
Add the meat and carrots: Place the seared roast on top of the onions in the pot. If you were able to use a 4 L or 4-5 Qt. pot, the meat should just fit, with a little room around the edges. This is good.
Mix the dry seasonings with the beef stock and pour over the roast. Tuck the carrots around the edges of the roast. Put the bay leaves on top of the roast. Bring everything back to a boil, then quickly reduce the heat as described below.
Cover tightly for a long simmer and prep the veggies: Cover the pan and adjust the heat so it is just barely simmering when covered. If your stove won’t go that low, you can put the (heatproof!) pot, covered, into your oven, set at 350 for 15 minutes, then turned to 225. Put the chunked up root veggies in a large plastic bag. Add 2-3 T. olive oil, twist the bag shut and moosh them around in the bag until they’re entirely coated with oil. Put them in the refrigerator – you’ll take them out in about 2-1/2 – 3 hours.
Time for a Glass of Wine: You’ve worked hard, now the roast will do the work. You’ll be simmering it for approx. 3 hours at a very gentle simmer. Do not open the pot. The pot should not be opened. Avoid pot openness. Keep a lid on it!
Time Passes And: After about 3 hours of simmering, take the veggies out of the refrigerator and layer them in a single layer in a large roasting pan or cookie sheet (or two). Sprinkle lightly with salt and put them in a pre-heated 400F oven for about 30 minutes.
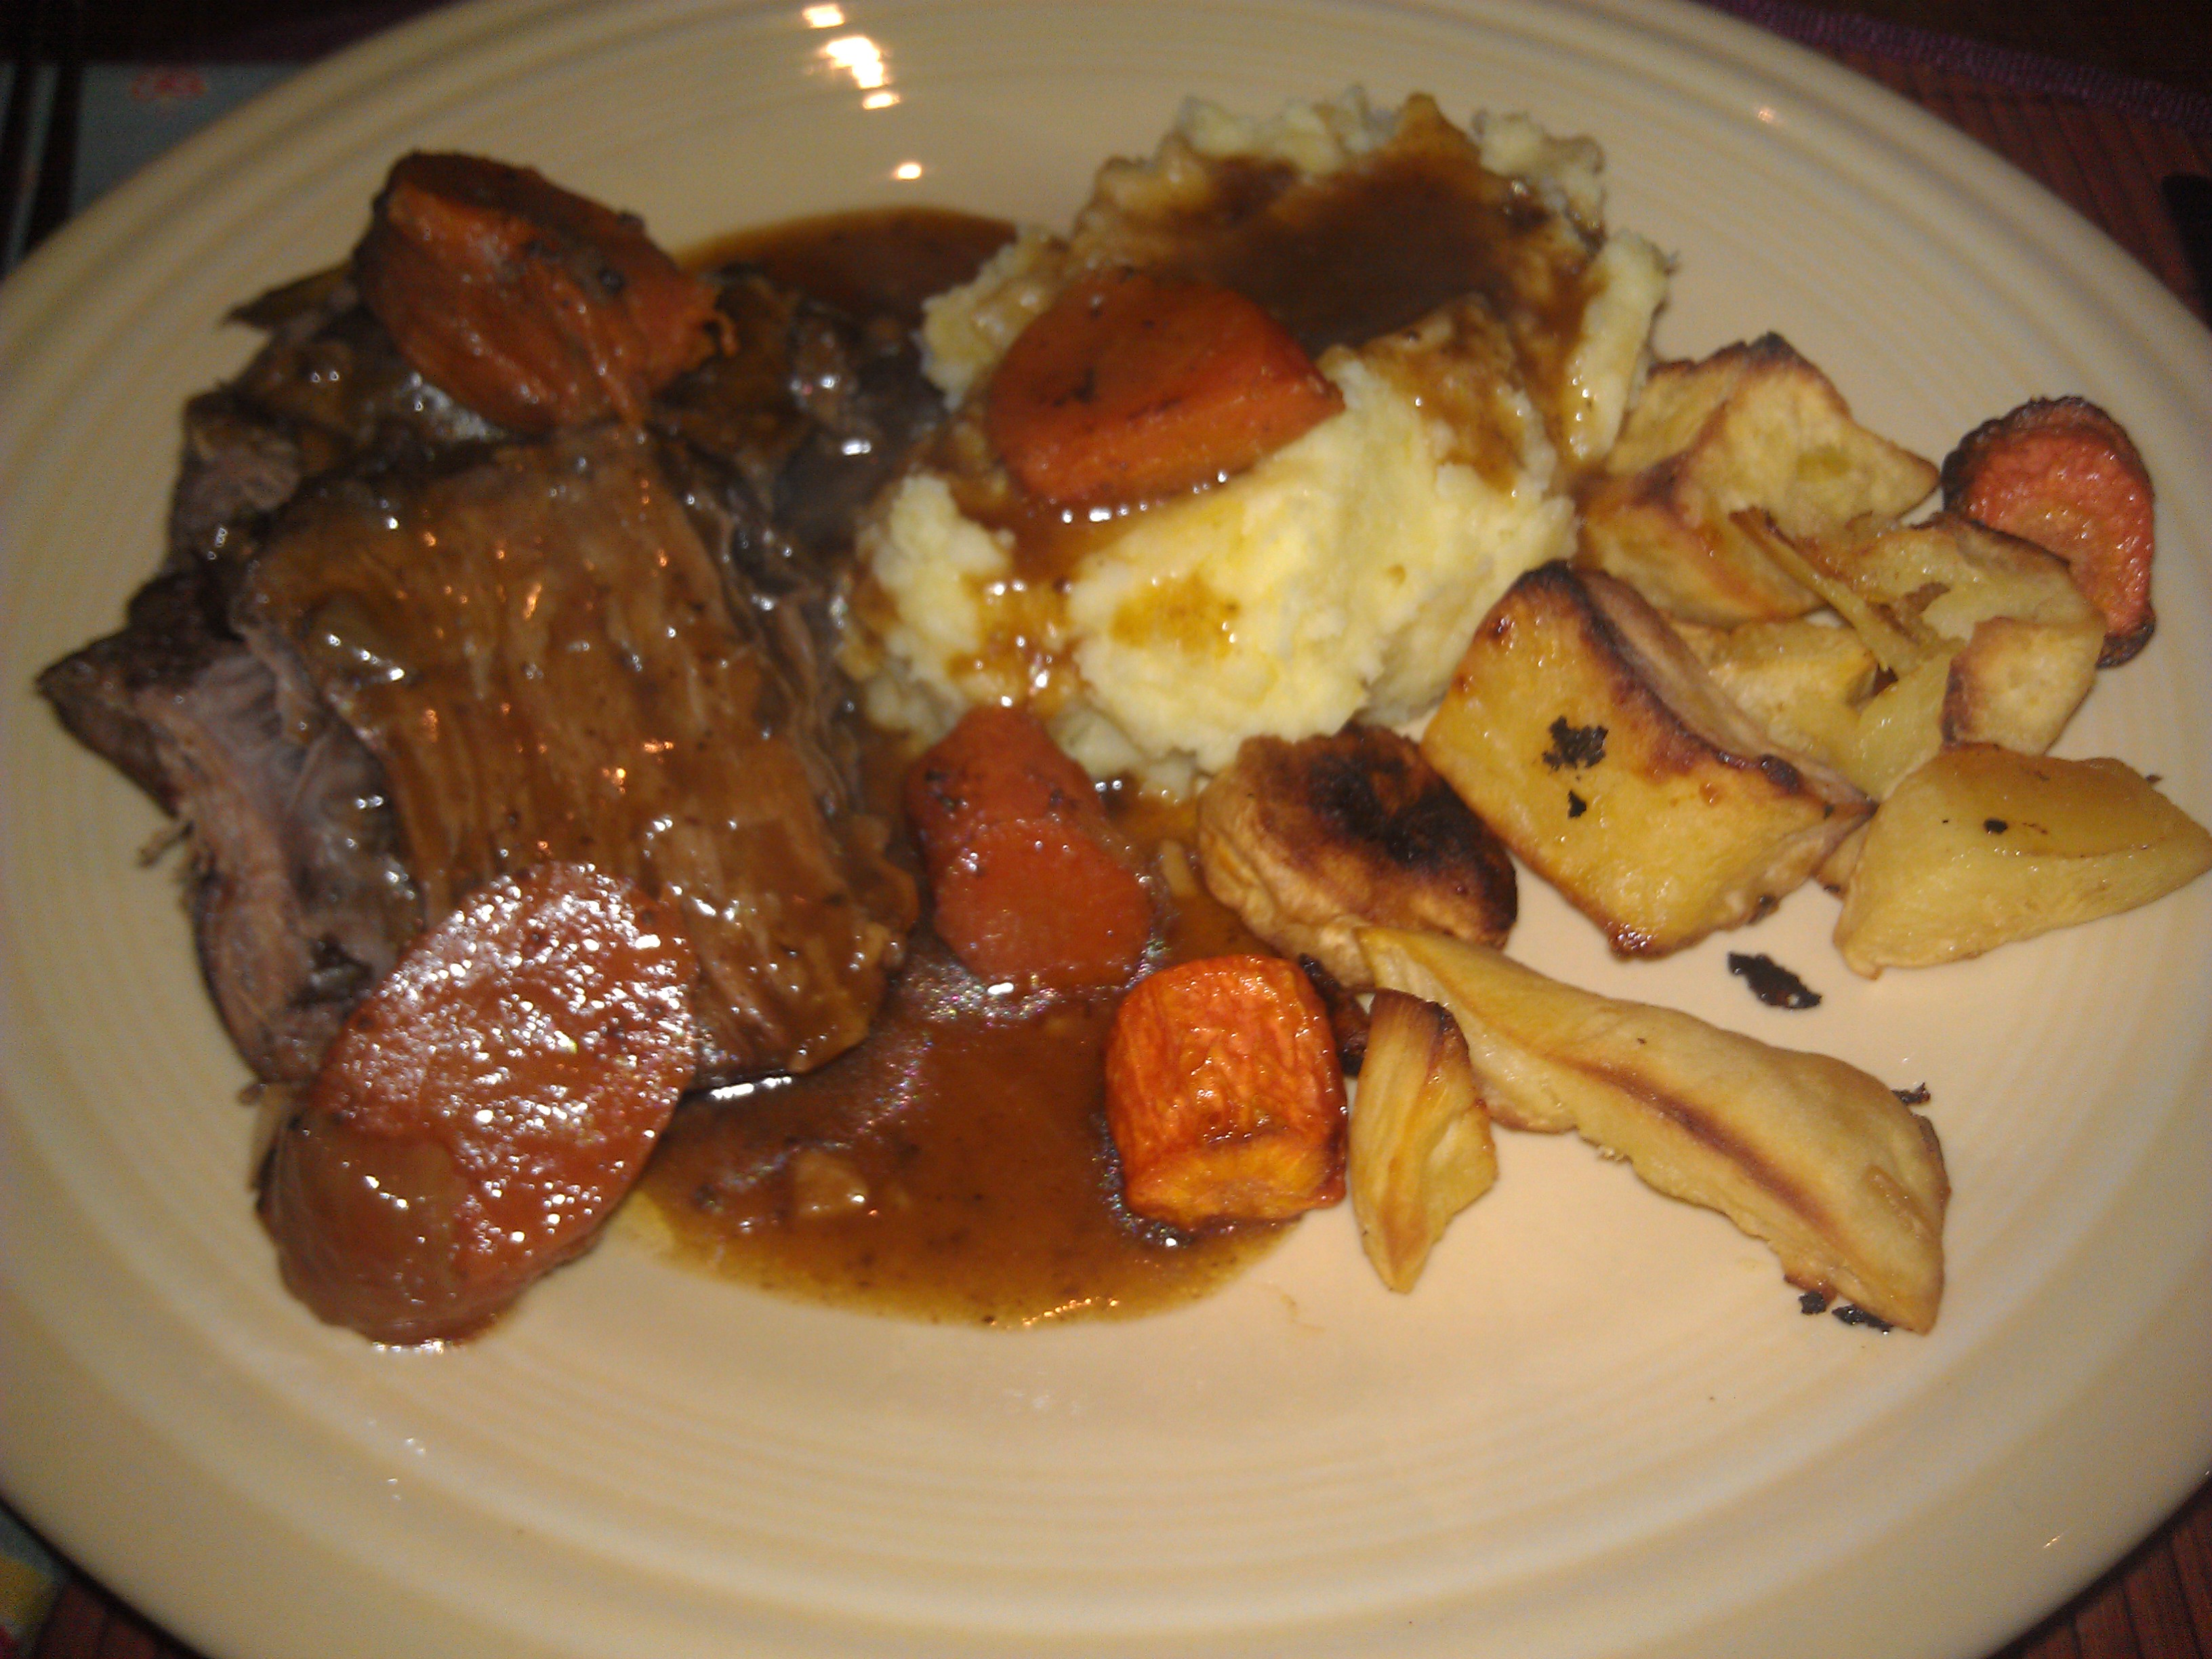
You’ve timed everything right and: The roasted root veggies should be done at roughly the same time as the roast. At last! Open the pot and test the roast. It should “tear” easily when you insert a fork. You’re not trying for shredding, think “meltingly soft”. Remove the roast to a warm serving plate and let it stand for 10 minutes, then put it on a cutting board, slice into thick slices and return to plate. Or just cut it on the plate, it’s a lot easier, if tougher on your knife. When you’re done, it should look something like this:
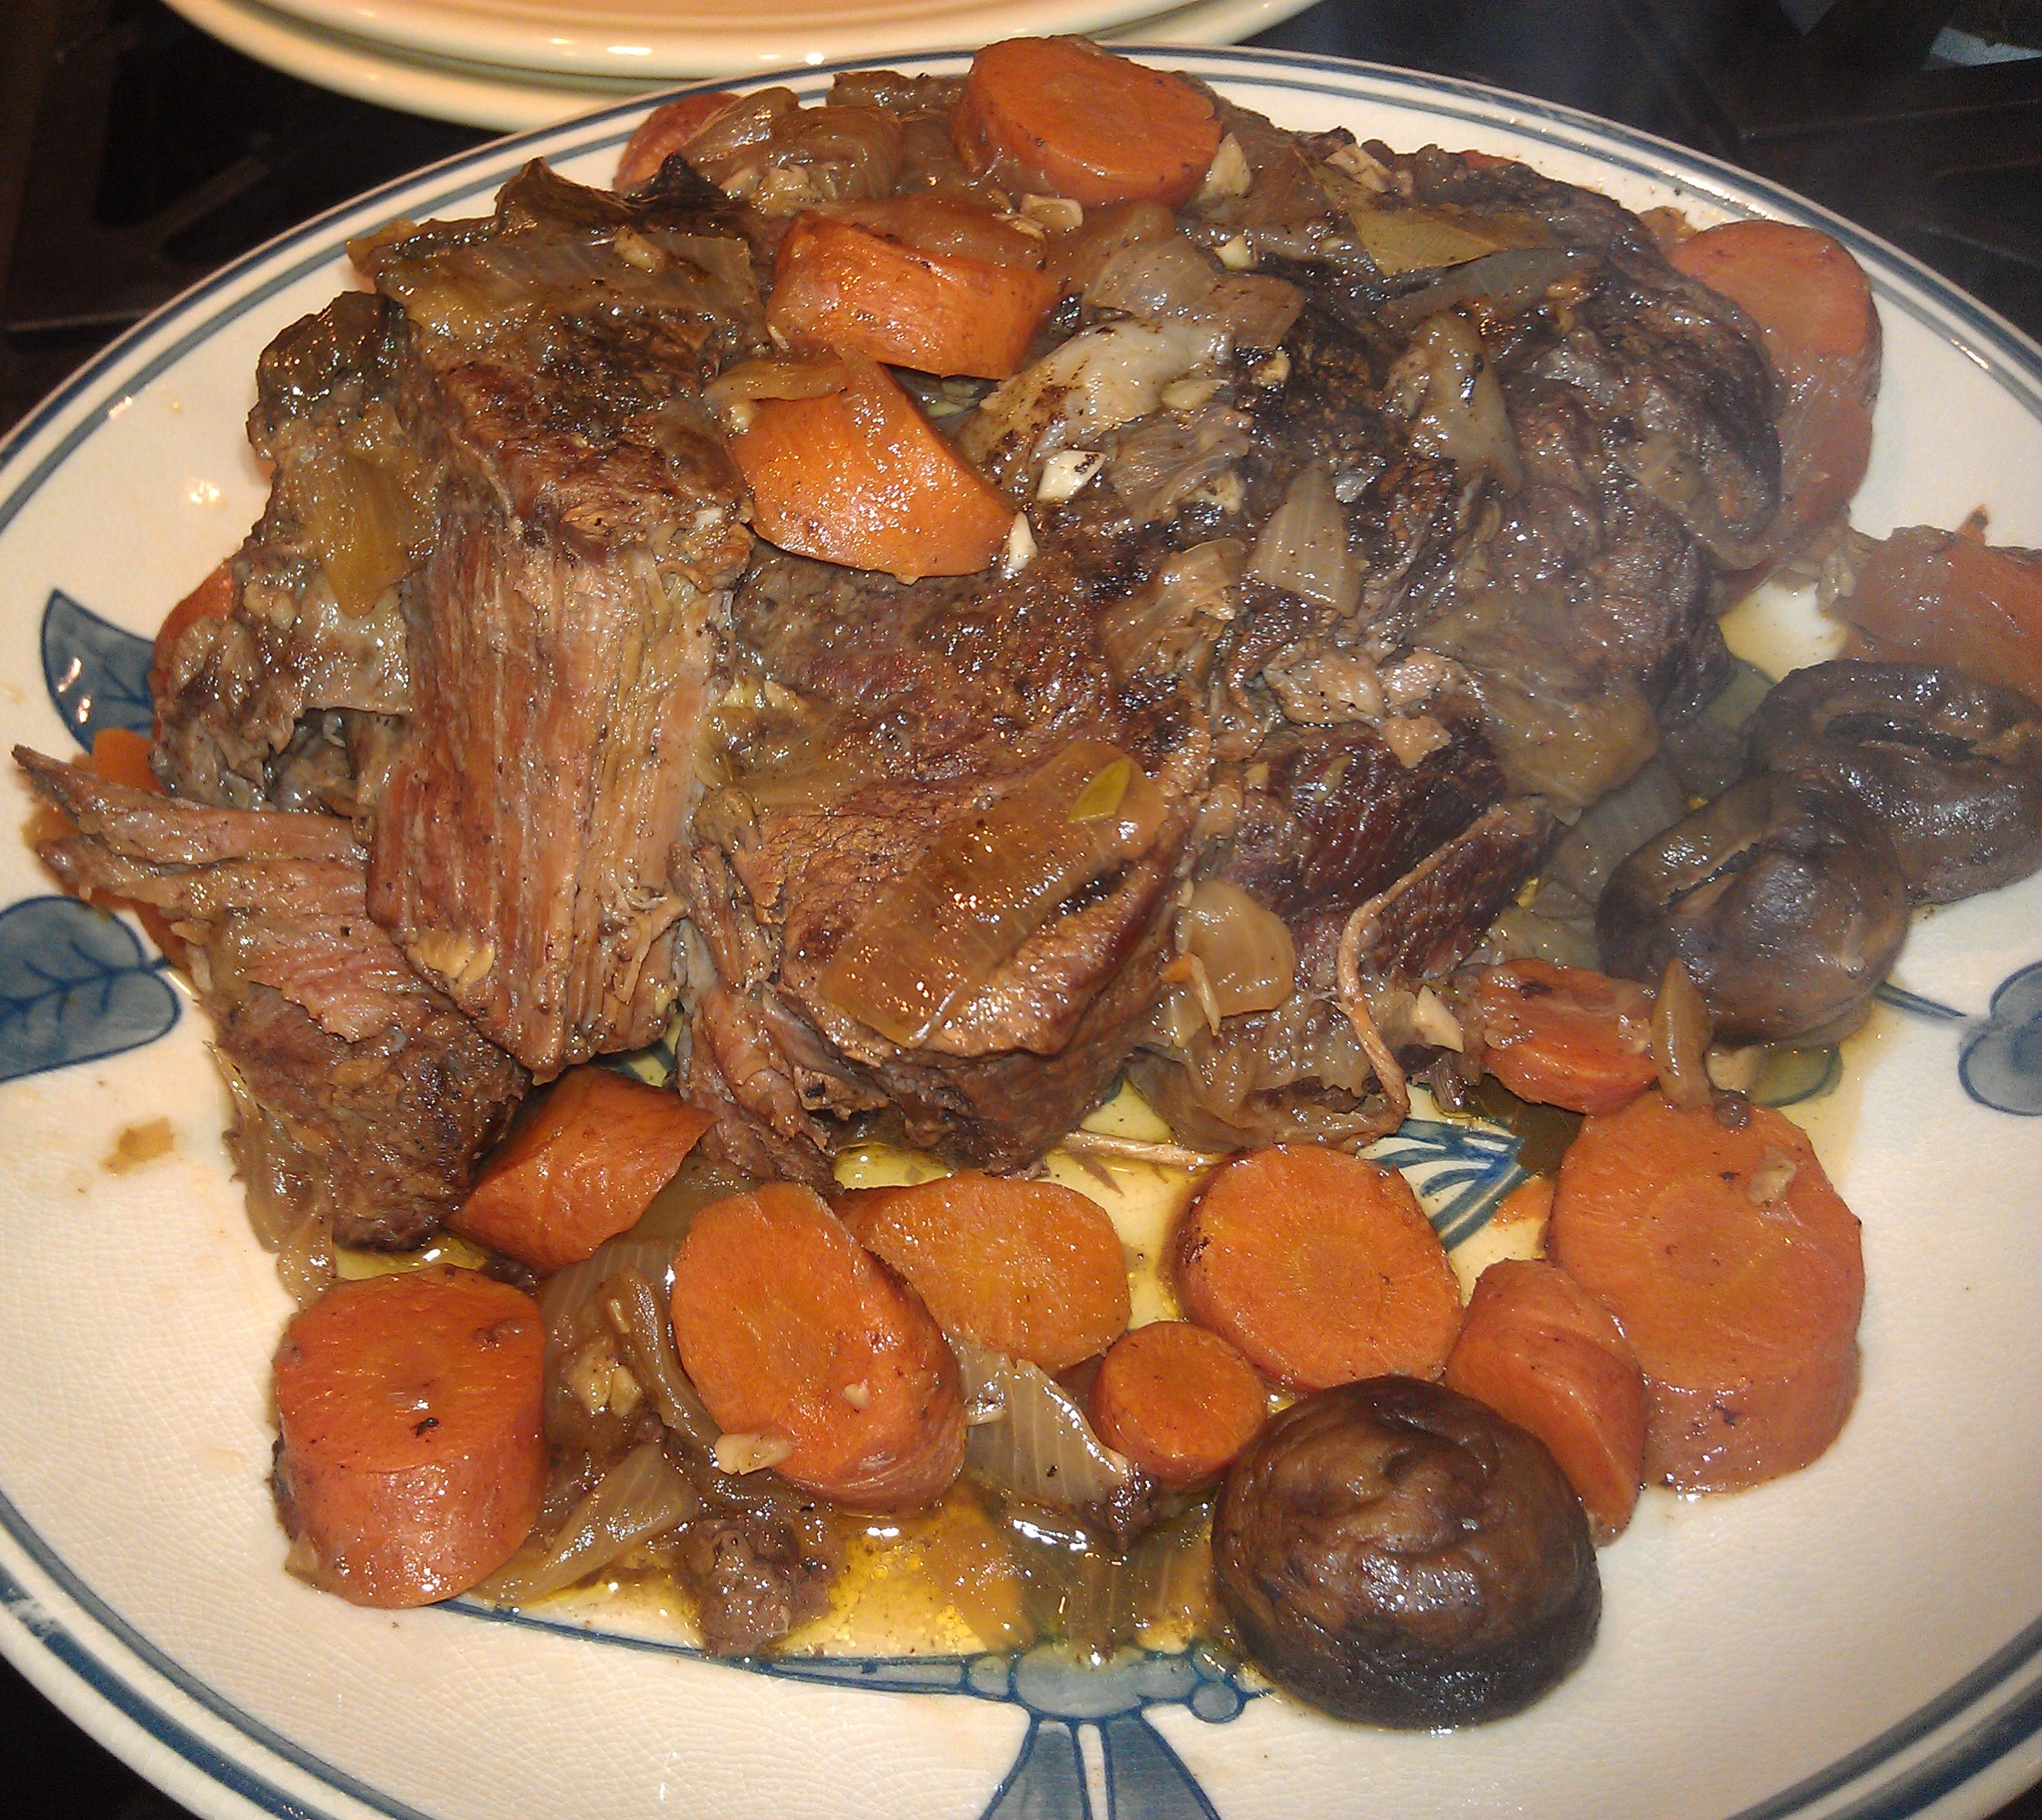
Ou est le boeuf?? Ici!!
Make gravy. Using a large slotted spoon, remove as much of the onion and solid stuff as you can from the liquid in the Dutch oven. While the roast is setting, crank the heat to high and reduce the liquid by about 1/3rd. Stir about 2 T. flour into a quarter cup cold water until it’s smooth. Using a large spoon without slots, put a couple of spoonsful of the hot liquid into the flour/water combo to temper it, then add it back to the liquid in the pot, stirring constantly until it thickens slightly and begins to take on a sheen.
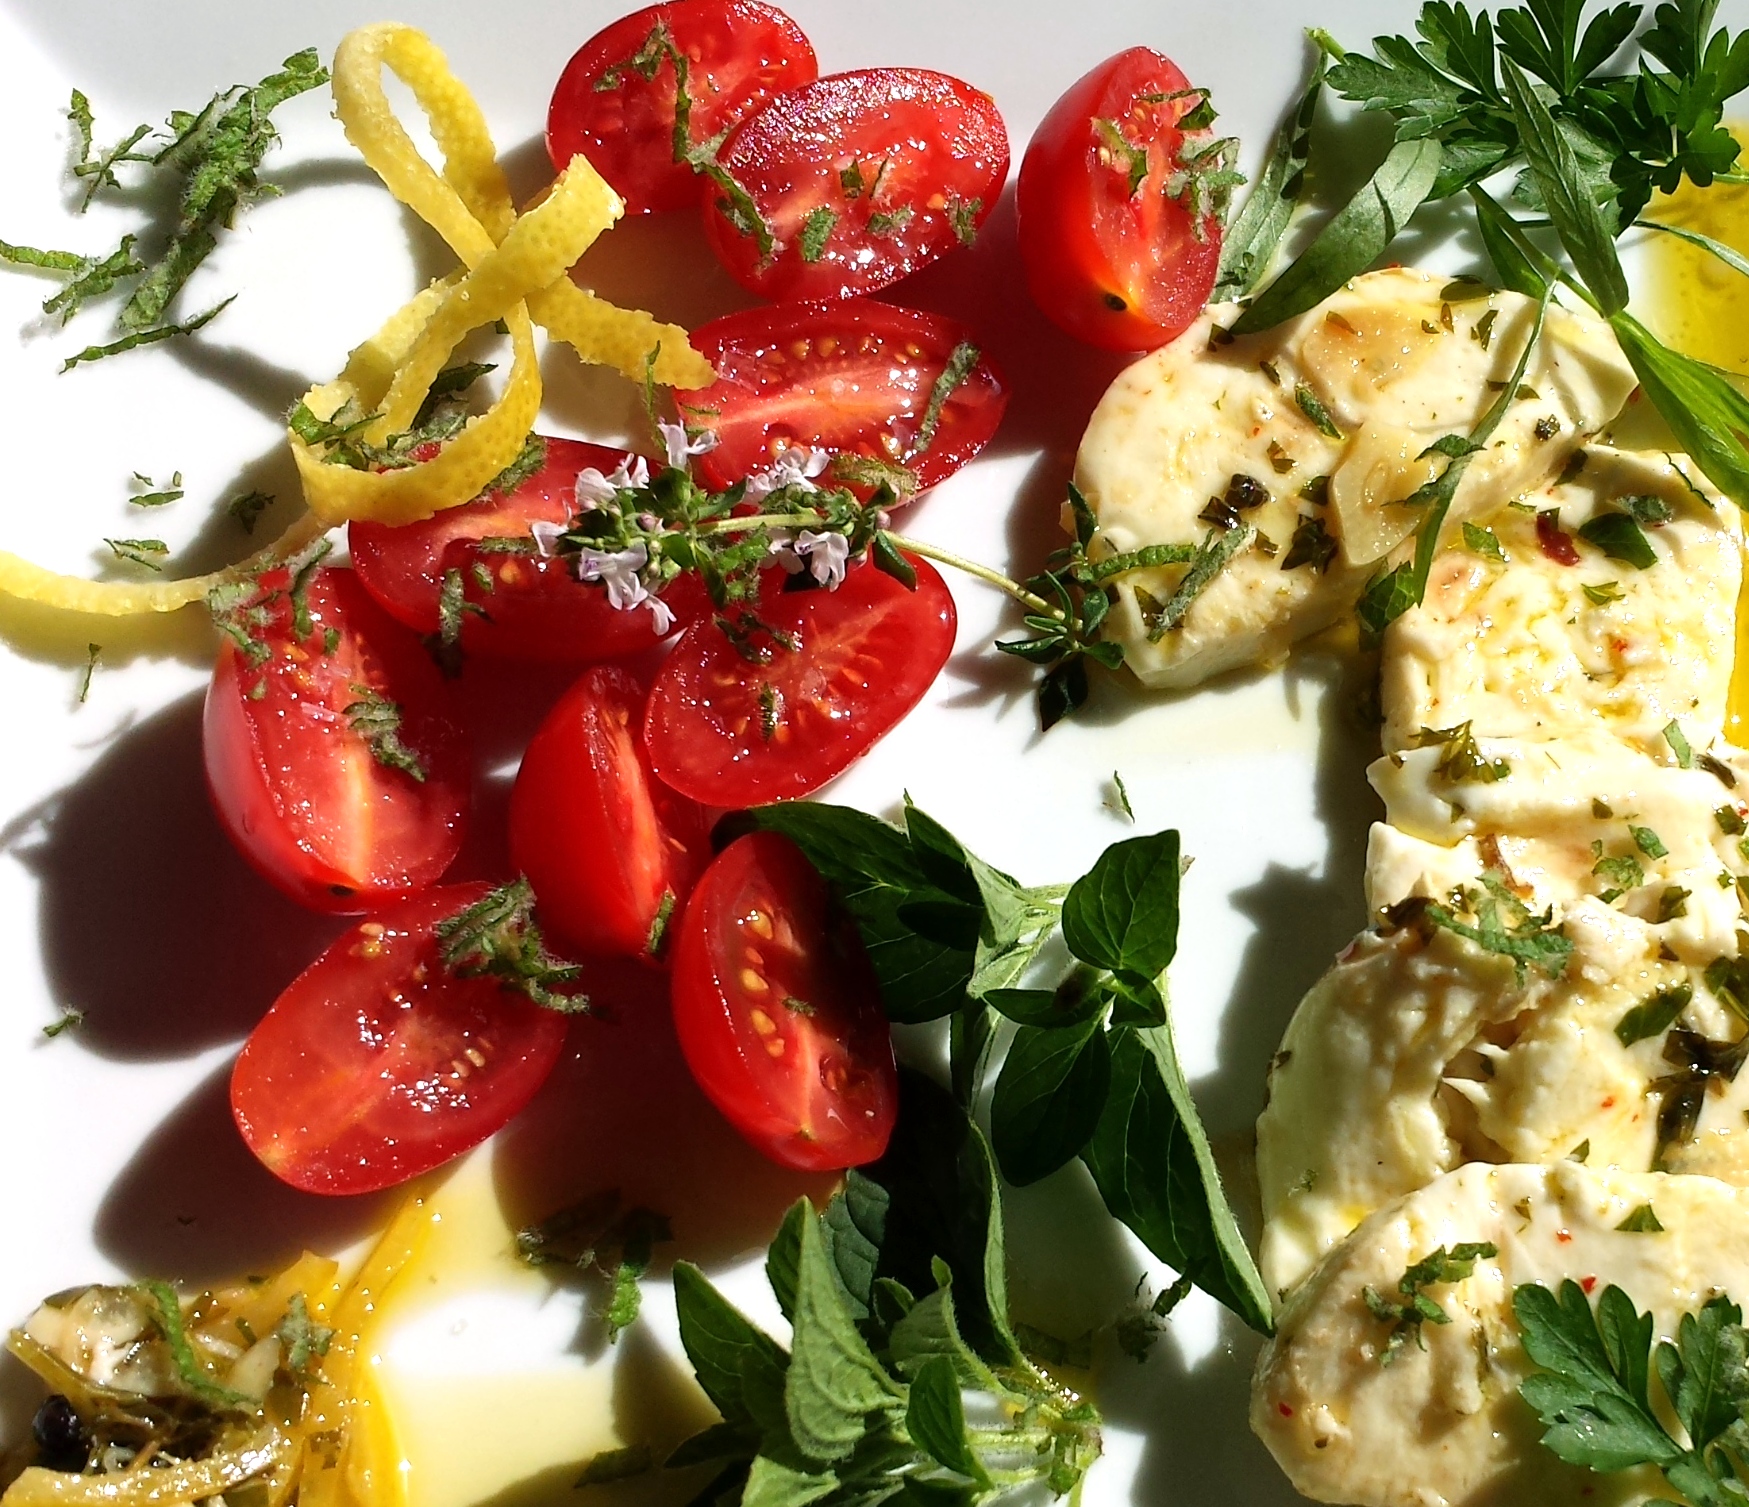
Arrange on warmed dinner plates with the root vegetables. Drizzle some of the gravy over everything you like gravy on, which around our house is generally everything. Serve with salad- we like Poor Man’s Caesar, with kale, it plays beautifully against the rich soulful taste of the meat onions and potatoes. On the plate, it looks like this (we served ours with a carb OD of mashed garlic horseradish potatoes).